Your first quadcopter is built. The motors are on, the wires are soldered, and the battery is charged. Then you pick it up and wonder whether it will actually fly. Most first-flight problems don’t come from bad parts. They come from a small set of assembly mistakes that almost every builder makes at least once. This post covers those mistakes for the build stage only. For the wider first-time setup, see our first drone setup guide.
Key takeaways
- Do every bench check and motor test with the propellers off.
- Most first-flight flips come from swapped props, wrong motor order or spin direction, or a flight controller facing the wrong way.
- Check polarity and solder joints with a multimeter, then calibrate in your ground station before you fly.
Before you start: why take the propellers off?
Remove every propeller before you do anything else in this post. A motor can spin up when you don’t expect it to, and a bare motor on a bench is harmless while a spinning prop is not. Keep the battery secured too, so it can’t slide into anything. Each mistake below follows the same pattern: the symptom you notice, the cause behind it, and the fix. If your drone flips, drifts or won’t arm, look for the matching symptom first.
Mechanical mistakes
1. Are your propellers on the wrong motors or upside down?
Symptom: the drone flips the moment it leaves the ground, or it won’t lift at all.
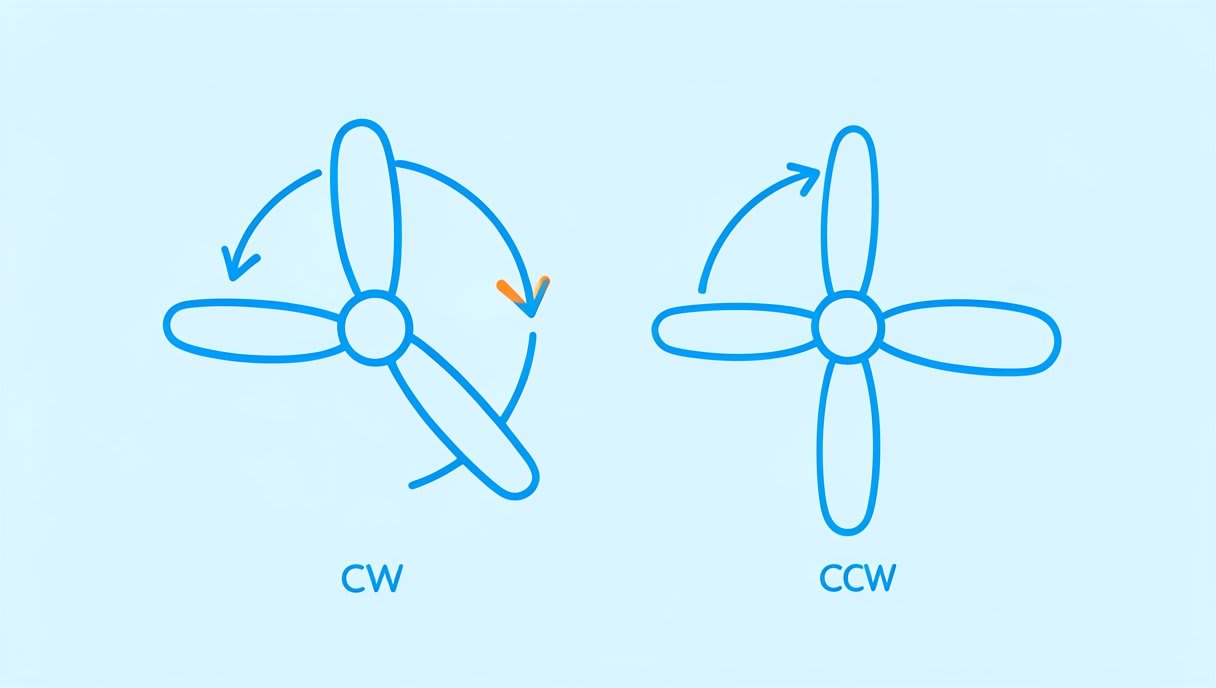
Cause: a quadcopter uses two clockwise (CW) and two counter-clockwise (CCW) propellers. The opposite spins cancel out each other’s twisting force, much like two people rowing on opposite sides of a boat. If you swap a CW and a CCW prop, or fit one upside down, that motor pushes air the wrong way.
Fix: match each prop to its motor’s spin direction. The leading edge is the thicker, rounded edge of the blade, and it should face the direction of rotation. The curved side of the blade usually faces up.
2. Loose screws or unsecured frame parts
Symptom: rattling, extra vibration, or a drone that drifts for no clear reason.
Cause: vibration slowly backs screws out, especially motor screws and standoffs (the posts that hold the frame plates apart).
Fix: check every screw and standoff by hand, then check them again after your first motor tests. Thread-locker, a liquid that stops screws working loose, is one common option on metal-to-metal threads.
3. Over-tightened screws
Symptom: cracked frame arms, stripped threads, or a motor that feels rough when you turn it by hand.
Cause: too much force. More torque doesn’t mean more security.
Fix: tighten until snug, never forced. Replace any cracked arm or stripped part rather than hoping it holds. Mechanical errors are easy to see. Electrical ones hide in plain sight, so let’s look at those next.
Wiring and soldering mistakes
4. What does a cold or bridged solder joint look like?
Symptom: a motor stutters, power cuts in and out, or the board won’t power on.
Cause: a cold joint looks dull, grainy or lumpy, and it often happens when the iron didn’t heat the pad and wire properly. A bridge is a blob of solder joining two pads that should stay separate.
Fix: reheat the joint with enough heat and flux (a paste that helps solder flow) until it flows smooth and shiny. Clear any bridges, then use your multimeter’s continuity mode to confirm that each joint connects where it should and nowhere else.
5. Reversed battery or power polarity
Symptom: no power, a burning smell, or damaged parts.
Cause: red and black swapped at the battery connector or on the power pads.
Fix: before the first battery goes in, set your multimeter to continuity mode (it beeps when two points are connected) and check that positive and negative are not shorted together. Then trace red to the positive pad and black to the negative. Inspect the battery itself for damage, and read our guide to storing and charging LiPo batteries safely.
6. Loose wires that can reach the propellers
Symptom: cut wires, or a sudden loss of power or signal.
Cause: untidy wire routing. A wire that sits fine on the bench can flap into a prop in the air.
Fix: run wires along the arms and secure them with cable ties or tape, well clear of the prop arc.

Setup mistakes
7. Motor order or spin direction doesn’t match the flight controller
Symptom: the drone flips instantly on take-off.
Cause: the flight controller expects each motor in a set position and spinning a set way. If you wire a motor to the wrong output, or one spins backwards, the board corrects the wrong corner.
Fix: compare your build with the motor diagram for your frame type in the official ArduPilot Copter documentation. If you’re building an FPV (first-person view) quad on Betaflight, the open-source FPV and racing flight control project, check motor order and direction in its own configurator and documentation. Don’t guess the numbering, because it differs between firmware and frame types.
8. Flight controller facing the wrong way
Symptom: the drone tilts or drifts in the wrong direction, or flips.
Cause: the arrow on the board doesn’t point to the front of the drone, or the mounting direction was never set in software.
Fix: mount the board with its arrow facing forward. If it has to sit another way, set the board orientation as your firmware’s docs describe.
9. Why won’t the drone arm? Skipped calibration
Symptom: the drone won’t arm (switch its motors on for flight), drifts in a hover, or the sticks feel wrong.
Cause: the accelerometer, compass or radio was never calibrated, so the flight controller doesn’t know which way is level or what your sticks are doing.
Fix: run the calibrations in a free ground station, the software on your laptop that talks to the drone. Follow the steps in your firmware’s official docs. Mission Planner from the ArduPilot community runs on Windows. QGroundControl, built by its open-source community, is cross-platform and works with PX4 and ArduPilot.
10. Testing motors with the propellers fitted
Symptom: injury or damage when a motor spins up unexpectedly.
Cause: bench testing with props on, often “just to check one thing”.
Fix: always test motors with the props off, and fit them only for the first real flight.
Your props-off pre-flight checklist
Copy this list and work through it on every new build:
- Propellers removed for all bench tests
- Every screw and standoff snug, not forced
- Frame arms checked for cracks
- Solder joints smooth and shiny, no bridges, continuity checked
- Power polarity checked with a multimeter, no short between positive and negative
- Wires secured along the arms, clear of the prop arc
- Motor order and spin direction match your firmware’s diagram
- Flight controller arrow facing forward, or orientation set in software
- Accelerometer, compass and radio calibrated in your ground station
- Props matched to motors (CW and CCW), leading edge forward, fitted only for the first flight
- Battery undamaged and strapped down securely
FAQ
Why does my drone flip over as soon as it takes off?
The usual causes are props on the wrong motors, a motor order or spin direction that doesn’t match the flight controller, or a board facing the wrong way. Check mistakes 1, 7 and 8 in that order. Use your firmware’s official docs for the exact motor order.
Why won’t my drone arm?
Common reasons are a skipped accelerometer or radio calibration, or a failed pre-arm safety check. Read the messages your ground station shows, then look them up in your firmware’s docs.
Should I test drone motors with the propellers on?
No. Always test with props off, and fit them only for the first real flight.
Practise while you build
A careful props-off check catches most first-flight problems before they happen. While you finish your build, practise take-off and control for free in the Aasma browser simulator at sim.aasmaaerospace.in: no install, keyboard controls and 6 missions. Curious what that practice gives you? Here’s what a simulator teaches you. When you’re ready to build a drone designed for students, explore Aasma’s drone learning kits. Build it. Fly it. Code it.